How Iron-On Patch Backing Works
Iron-on backing is a heat-seal adhesive film that bonds a patch to fabric at roughly 150°C.
The adhesive melts under a household iron, flows into the fabric fibres, and sets as it cools. This page explains how iron-on patch backing works, what the adhesive is made of, and why the bond holds on a finished garment.
- Heat-Seal Backing as Standard
- Made in Birmingham
- Free Design & Proof
What Is Iron-On Patch Backing?
Iron-on backing is a thin layer of thermoplastic adhesive applied to the rear of a patch. The backing turns a standard embroidered patch into a heat-activated patch. Manufacturers laminate this adhesive film onto the twill base during production, so the patch arrives ready to press.
Iron-on backing serves one job: it fuses the patch to a surface using heat instead of stitches. The method removes the need for a needle and thread at the application stage. A user positions the patch, applies an iron, and the adhesive does the work.
This backing type sits within a wider family of patch backings. Sew-on backing, hook-and-loop (Velcro) backing, and adhesive backing each attach a patch differently. Iron-on backing differs from these because it relies on a thermo-adhesive bond rather than mechanical fixing. We explain the full range on our patch backing types guide.
What Iron-On Backing Is Made Of
Iron-on backing consists of a heat-seal adhesive film bonded to the back of the patch. The film is a hot-melt adhesive, usually a polyamide or polyester-based thermoplastic. Thermoplastic adhesives soften when heated and harden when cooled, which makes them ideal for repeated, controlled activation.
The adhesive carries no tack at room temperature. The backing stays dry and smooth until heat reaches it. Heat changes the adhesive from a solid film into a molten, sticky liquid, and that change is the entire principle behind iron-on patches.
The Heat-Seal Adhesive Film
The heat-seal film is the working component of iron-on backing. The film has a defined activation temperature, the point at which the adhesive begins to flow. Most patch adhesives activate between 130°C and 160°C, which matches the cotton setting on a domestic iron. Our heat-seal patch guide covers activation temperatures for every fabric type.
The adhesive film holds three properties that matter for a clean bond:
Melt point
The temperature at which the thermoplastic turns molten.
Flow
How readily the molten adhesive spreads into the fabric weave.
Set strength
How firmly the cooled adhesive grips the fibres.
These three properties decide how well the patch attaches. A correctly engineered film melts evenly, flows into the fabric, and sets into a durable bond.
How the Backing Layers Sit on the Patch
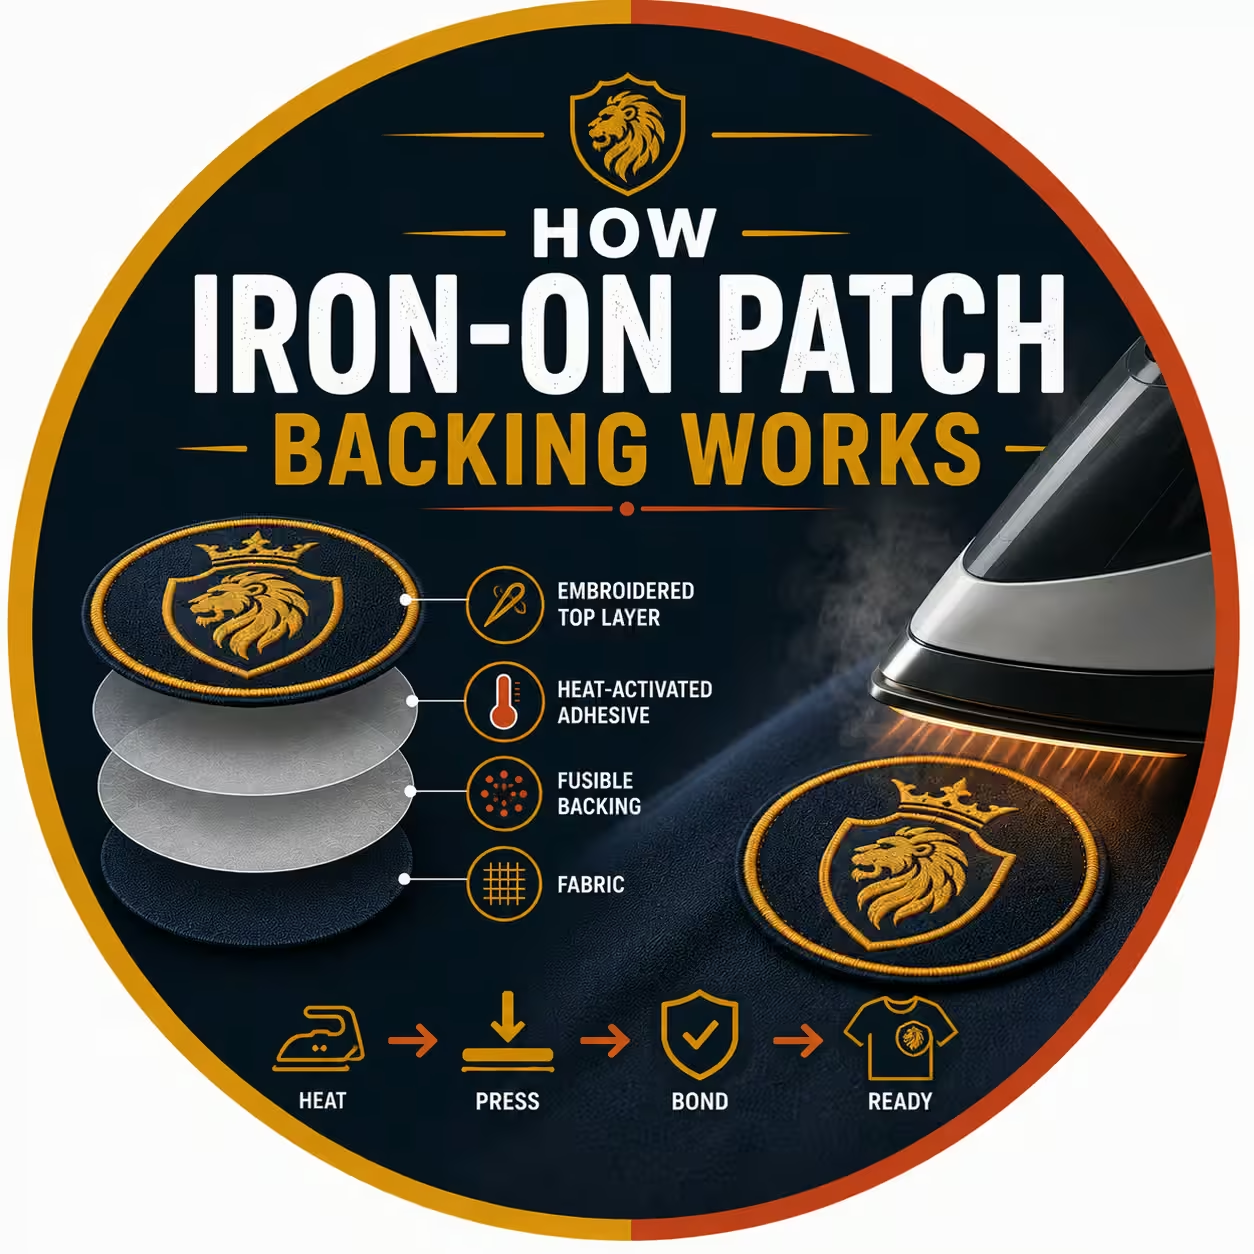
An iron-on embroidered patch is built in layers. The embroidery thread sits on the front. A twill fabric forms the base. The heat-seal adhesive coats the rear of that twill base. This layered construction keeps the adhesive flat against the patch and ready for even heat distribution.
The backing covers the full rear surface, so the patch bonds across its whole area rather than at the edges alone. Full-area coverage spreads the load and reduces lifting at the corners, the most common failure point on a poorly backed patch. That construction principle leads directly into how the activation process unfolds.
How Iron-On Backing Works: The Activation Process
Iron-on backing works in three stages: heat activation, pressure with dwell time, and a cooling bond. Each stage transforms the adhesive in a specific way. The patch attaches successfully only when all three stages complete in order.
Step 1 – Heat Activation
Heat activates the adhesive film first. The iron transfers thermal energy through the patch and into the backing. When the adhesive reaches its activation temperature, the thermoplastic melts and becomes liquid. The solid film converts into a molten layer that can flow.
Temperature controls this stage entirely. Too little heat leaves the adhesive solid, so the patch never bonds. Excessive heat scorches the thread or the garment. The correct temperature, the cotton setting on most irons, melts the adhesive without damaging either surface.
Step 2 – Pressure and Dwell Time
Pressure drives the molten adhesive into the fabric. Firm, even pressure from the iron pushes the liquid adhesive between the fabric fibres. The molten layer fills the gaps in the weave and wraps around individual threads in the garment.
Dwell time supports this action. Dwell time is the period the iron stays in place, typically 30 to 60 seconds. A longer dwell allows the adhesive to penetrate deeper into the fabric. Pressure and dwell time together create the mechanical interlock that holds the patch in position.
Step 3 – The Cooling Bond
Cooling completes the bond. When the heat source lifts, the adhesive temperature drops below its melt point. The molten adhesive re-solidifies and locks around the fabric fibres it penetrated. The patch and the garment become a single bonded unit.
The cooled adhesive forms a mechanical bond, not a chemical one. The hardened adhesive grips the threads physically, much like roots holding soil. This is why a patch must cool fully before the garment moves, disturbing the adhesive during cooling weakens the final grip.
How to Apply an Iron-On Patch
Applying an iron-on patch follows a fixed sequence. The process activates the heat-seal backing correctly and protects both the patch and the garment. Follow these steps in order:
Heat the iron to the cotton setting.
Set the iron to roughly 150°C and switch off the steam. Dry heat activates the adhesive; steam interferes with the bond.
Position the patch.
Place the garment on a hard, flat surface and set the patch where you want it. A hard surface transfers pressure evenly into the backing.
Cover the patch with a pressing cloth.
Lay a thin cotton cloth or baking parchment over the patch. The cloth shields the embroidery thread from direct heat.
Press firmly for 30 to 60 seconds.
Hold the iron in place with steady, downward pressure. Do not slide the iron, movement shifts the molten adhesive.
Turn the garment inside out and press the reverse.
Apply heat to the back of the fabric for a further 20 to 30 seconds. Heating both sides drives the adhesive deeper into the weave.
Allow the patch to cool fully.
Leave the garment untouched until the adhesive sets. A cooled bond reaches full strength only once the thermoplastic has hardened.
Our how to apply iron-on patches guide expands each step with troubleshooting for stubborn fabrics.
Why Iron-On Backing Holds
Iron-on backing holds because the cooled adhesive interlocks with the fabric fibres. The strength of that interlock depends on three factors: the fabric, the heat, and the pressure. A bond fails when any one of these factors falls outside its working range.
Fabric Type and Weave
Fabric type decides how well iron-on backing bonds. Natural fibres with an open weave accept the molten adhesive readily, so the bond grips deeply. Smooth or coated fabrics give the adhesive little to grip, so the patch lifts more easily.
Iron-on backing performs best on these fabrics:
Recommended Fabrics
- Cotton Porous and heat-tolerant, the ideal surface.
- Cotton-polyester blends Reliable, provided the heat stays moderate.
- Denim Thick and absorbent, an excellent host for the adhesive.
- Canvas and twill Durable weaves that anchor the bond firmly.
Fabrics to Avoid
Iron-on backing struggles on nylon, leather, waterproof coatings, and high-polyester fabrics. Synthetic fibres melt or repel the adhesive, so we recommend sew-on or Velcro backing for those surfaces.
The Heat, Time and Pressure Balance
Heat, time, and pressure work as a single system. Correct heat melts the adhesive, sufficient time lets it penetrate, and firm pressure forces it into the weave. Removing any one variable breaks the bond. A patch pressed briefly with low pressure will peel, even at the right temperature. See our guide on how long iron-on patches last for more on wash durability.
Iron-On Backing vs Other Backing Types
Iron-on backing is one of three common backing methods. Each backing attaches a patch differently and suits a different use. The table below compares iron-on backing against sew-on and Velcro backing.
| Attribute | Iron-On Backing | Sew-On Backing | Velcro Backing |
|---|---|---|---|
| Attachment method | Heat-seal adhesive | Thread and needle | Hook-and-loop |
| Permanence | Semi-permanent | Permanent | Removable |
| Application | Household iron | Hand or machine | Press hook side |
| Best fabrics | Cotton, denim, twill | All fabrics | All fabrics |
| Repositionable | No | No | Yes |
| Skill required | Low | Moderate | Low |
Iron-On vs Sew-On Backing
Iron-on backing attaches with heat; sew-on backing attaches with thread. Iron-on backing applies faster and needs no sewing skill. Sew-on backing holds permanently and survives heavy use and frequent washing. We compare both methods in detail on our iron-on vs sew-on patches guide.
Iron-On vs Velcro Backing
Iron-on backing creates a fixed bond; Velcro backing creates a removable one. Iron-on suits patches that stay in place permanently, such as a logo on a uniform. Velcro suits patches that change often, such as tactical and morale patches that move between garments. We compare iron-on and Velcro backing in detail on our velcro vs iron-on patches guide.
Our Customers Reviews
Customers across the UK rate our custom iron-on patches for adhesive quality and bond strength. Schools, workwear brands, and motorcycle clubs return to us because the backing holds through repeated wear and washing. Every patch ships with a heat-seal backing applied and tested at our Birmingham workshop.
Read verified feedback on our reviews page.
Frequently Asked Questions
Summary
Iron-on patch backing turns heat into a permanent-feeling bond without a single stitch. A thermoplastic heat-seal film melts under an iron, flows into the fabric weave, and hardens around the fibres as it cools. The bond depends on a balance of heat, dwell time, and pressure, and it grips best on porous fabrics such as cotton and denim. For permanent fixing on synthetics, sew-on backing remains the stronger choice, but for fast, skill-free application on the right fabric, iron-on backing is the most practical patch backing available. Order your own custom iron-on patches made in the UK with heat-seal backing applied as standard.